How to organize a stamping card class
When a new Stampin’ Up!®️ catalogue comes out, I like to sit down with it and pick my favourite stamps sets. Then I try to figure out which ones I’d love to hold a class with. This way I have a draft idea of what classes I’ll be offering for the next 3 to 4 months.
When picking out the stamp sets, I remind myself that I have to create easy to assemble cards. Will it be a product-based class, technique class or some other kind of event?
In this article, I want to help you plan a card class and I’ll give you step by step instructions on how you can get your planner ready with your upcoming classes!

Step 1
You need to find products that inspire you, that you are excited to craft with.
I usually work with a bundle: a stamp set with its coordinating dies or punch.
Working with Designer Series Paper makes for easy to assemble cards too, I highly recommend going this route.
Be mindful if you use a stamp set, pay attention to which stamp you are using on your projects, because your customers will need to use the same stamp at the same time.
TIP: I try to use 1 to 2 stamps from the set per card and not use it on another project for that class.
This way, I know the person working on a specific card will have the stamps she needs to complete her project. And the person next to her, working on a different project will also have all the pieces she needs to assemble her card.
Using DSP is ideal for a card class because you can cut the pieces ahead of time, and nobody needs to wait on a stamp to complete their projects. It’s quicker for everyone.
Step 2
Pick a date and time (go for consistency)
Try to pick a time that works for you, and your customers. And figure out how often you would like to hold your card classes. Every month? Every other month? Twice a month?
Whatever you decide, I would stick to it so that your customers can plan ahead and know what to expect from you.
You’ve heard this before and you’ll hear it time and time again: CONSISTENCY is key!
Put yourself in your customers’ shoes, it’s nice to know when the next class will be.
It’s also nice for you, because you know when you need to design and prepare the next class.
Step 3
Find a location (free if possible, ie. library, home, friends house, church…)
I like to find a spacious spot that is not expensive to rent, or even better, that is completely free!
If you have room in your house it is probably even better because you don’t have to carry all your tools and packages from one location to another.
I like to book my local library’s activity room, it’s free and central for me. It has nice big tables and can accommodate 8 people comfortably.
Step 4
Pricing
When I calculate my costs, I need to take into account all my expenses:
Consumables (cardstock, embellishments, enveloppes, DSP, etc)
Hall rent (if applicable)
Is this a product-based class? If yes, you need to figure out the cost of the products used that your customers will be purchasing to attend the class. (a kit, an embellishment, a Memory & More Pack)

15% + 11% = 26%
11.00$ x 1.26 = 13.86$
This means I need to make sure to include that 13.86$ to cover the cost of the Hearts & Flowers embellishment they will be using on their projects. I consider it a gift, a little something extra for them to bring home and keep using on future projects.
I would charge 35$ to round it up to an even number. The usual 20$ for the 4 cards, and an extra 15$ to cover the embellishment and my time to prepare all the projects.
If it is not a product based class, then I have my minimum fee of 20$ for 4 different cards.
Step 5
Promote and get registrations
This step and the next one could be reversed, but I don’t always create my projects before sending out my invites.
I aim for 4 crafters minimum and I stop taking registrations after 8 people signed up.
8 people is my sweet spot.
I create a graphic on Canva saying which stamp set, bundle or whatever products I will be using in my next card class.
I then create an event on Eventbrite so that people can register. It helps me control the number of available spots and I also get my customers information. (I ask my crafters to send payment via e-transfer, they don’t have to pay on this platform). I will be able to use the link from this event to share with my customers.
I then create an event on my Facebook Page where I share the link I got from Eventbrite.
TIP: Send out personal invitations to your customers, either by email or on Messenger. I really noticed a difference in my sign ups when I did this.
If they can’t make it, they’ll just say so, but at least you gave them the option of choosing for themselves if they wanted to come to your class or not.
I always tell myself, I would rather get a “No, thank you” during the registration period than a “Oh! I didn’t know” after the class.
I am a small business demonstrator, I am pretty close with my customers and they ask me to remind them about my classes.
I do send out an email too, one to announce the class, one to remind about registrations and one when it’s the last day to register.
Step 6
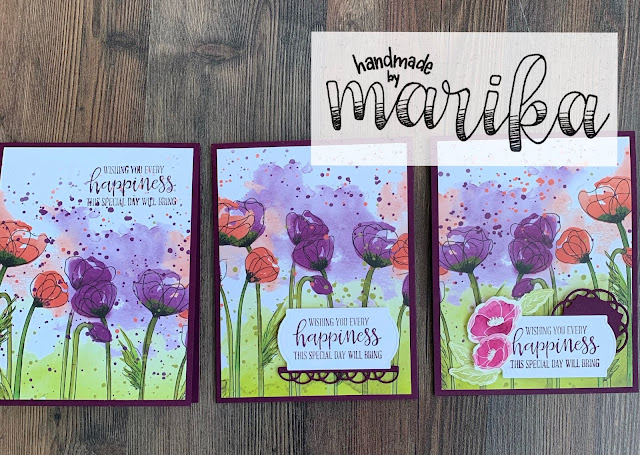
Create projects (think easy and quick to assemble)
Now for the fun part, and also the hard part: you get to create your projects! 😀
What cards will your customers make?
I say it’s also the hard part because it can be a little difficult to create projects that are easily to duplicate. You want your customers to feel confident that they can actually make the card you designed.
Think easy and very few layers.
For instance, stick with a DSP layer, a label for the sentiment, an image and some embellishments.
I try to make 3 of the 4 projects easy and then 1 card that is a bit more for the avid crafter.
Unless you know you want your card class to be a technique class, then go ahead, but maybe cut back on the number of projects offered at that class.
Remember that you also have to help out when they have questions.
Another reason you’d want your projects to be fairly simple is for the prepping of the class, which brings us to the next step.
Step 7
Cut and prepare packages
Now that you’ve created your amazing cards, you need to prepare your customers’ packages.
I try to have the DSP pre-cut, all card bases and cardstock cut to size and have all the label die-cuts done.
This way, the only thing my crafters will have to do is stamping and cutting out the images to complete the cards.
This saves on time and I find prevents frustrations with cutting directions.
I find that making 4 cards in 2 hours is enough, but then again, I have customers who would need more time. They usually do the stamping and cutting at the class, then the glueing and assembling at home. (I let them take pictures of my card samples)
Once everything is cut, I even package all the pieces for each project and put them all in their respective envelope.
Step 8
Set up space
It’s the day of the event and now all you have to do is place everything.
I place a grid paper for every crafter with a Shammy that I cut into fourths, I put their projects at their place.
Or sometimes, what I’ll do to prepare the stamps they need for the specific project, I’ll place everything for that card in a basket. The stamp on a block, the ink pad, the die if needed.
So one basket will hold everything needed for one project, this way they can just pass the basket along to the next crafter when they’re done.
Step 9
Have fun
The best part!
You get to see your customers’ faces light up when they create their cards.
Let them be creative, try out new techniques and make a mess!
After all, your projects are simply ideas to inspire them.
I love seeing the diversity of cards that come out of the class because one crafter put their pieces in different places on their project.
I also enjoy seeing my customers collaborate and help each other out.
It really is a great community full of inspiration and respect.
I’m sure you already have your favourite stamp set picked out?
Why not plan a card class around it and invite your friends over for a fun night of chatting and crafting. Trust me, they’ll ask for more!
Let me know in the comments which stamp set you used for your first class.
If you want inspiration, watch me make a card tonight during my Facebook Live, at 8pm Atlantic Time.
.jpg)
See you there!
Let's make this world a better place one handmade card at a time.
Marika -xo

Comments
Post a Comment